Feeds:
Posts
Comments

Archive for August, 2009

Anniversary Post


It’s a year since my first post. With such a diverse range of woody, slightly woody and not-very- woody-at-all activities it can be hard to keep track of progress. At times it can seem that I’m going backwards but writing the posts has helped me to focus more on what I am achieving, and if it helps inform, educate or even entertain as well then I am delighted. By the way, spot the deliberate mistake in the photo?


I spent the bank holiday weekend working, demonstrating on my pitch at the Weald & Downland Museum. With no special events on the museum was calm and it gave me the opportunity to talk to many visitors. It was a little odd to be the star turn, as aside from myself, only the miller in the watermill and the turdor kitchens were demonstrating over the weekend. Even the forge was silent.

The green man always reminds me that the seasons move on and though the weather ended warm and sunny on Monday Autumn was in the air.


OK so I took the first photo on a timer. I dashed to the lathe only to discover I’d forgotten to wind the cord around the workpiece. This one is a little bit better, shame about the berk on the lathe. Several people wanted to buy the display tables so I’m going to have to fix the legs properly, the shavings have started to sell well (I expect the firelighting ones to sell well from now on) and somebody even talked me into selling my demo spinning top – so I have plenty of work to do this week.

Read Full Post »

The MOT test looms. Georgina, my short wheel base (swb) 1965 landrover with the canvas tilt (rag) top has developed a saggy bottom over the last couple of years. It’s only 9 years since I last changed the springs but I think some rather large loads of logs have done for them. One of the culprits is revealed. Removing the spring bolts is often a real nightmare and can involve lots of hammering, sawing and burning to extract them. This one came out too easily with half the bush still on it. The bolt and hanger will find a new life as part of a pole lathe, whilst the old springs are delivered to friendly blacksmiths for conversion to useful green woodworking tools. For her 44th birthday I’ve decicded to uprate her suspension. I’m fitting parabolic shaped springs rather than the original elliptical which should give better suspension. I’m also fitting gas shock absorbers to cope with the uprated suspension. Fitting the new bushes is a bit of a struggle. I use a spanner and a G-clamp to apply pressure to the bushes until I can fit the split pin. Saggy bottom removed (and then a bit) and a good wash and brush up (and anti-rust and paint) at the same time. No other nasties found at the rear but the front will likely proove a more complicated story.

Read Full Post »

Birch Perch


Finding time to start making furniture, even simple pieces, has eluded me. So despite the list of urgent jobs I put things aside last week to work on my first stool. I thought I’d pick something simple enough to be able to assemble in a few days though I modified the basic post and rung recipe enough to cause me some problems. The first problem being my decision to use birch rather than ash. The wood for the legs is spalted (the first signs of decay in the wood introduces colour along the grain) and it makes the wood softer in places.


I also had not thought through the need to have dry rungs to slot into the slightly green posts(legs) otherwise the joints will slacken as the wood contracts. Normally this entails a gap of several days between making the rungs and being able to turn down the tenons for assembly. Luckily a previous false start left me with enough dry roughed out blanks to make the stool, though harder work to finish off the dried wood. Rather than borrow a drill bit I tried to resurrent one of my many augur bits for a brace. In hindsight a mistake since the bit is still a little damaged and tends to tear on the softwood. I made a lot of test joints like the one here to practice, as I only had four spalted legs so no mistakes allowed on the real ones.


The rungs around the top or seat of the stool need to be shaved to shape as the seat material is woven around them. They are normally oval to help retain strength laterally. The birch was quite knotty and with twisty grain so no matter how much I sharpened the drawknife I still could not finish the wood neatly. So I had my first, and much needed. lesson in cabinet scraping, Many thanks to David and Derrick for patiently instructing me in the arcane art of sharpening and using my scraper.


Only a couple of minutes with the scraper resurrected the surface of this rung from being nasty to a finish thats quite acceptable.


The first pair of posts and rungs assembled. It’s taller than a foot stool, I’ve made it coffee table height, with the aim of using it as a stool for playing my guitar. No disasters so far. Only another 8 perfect holes to drill with a manky bit and soft spalted wood. Asking for it really!


The stool went together quite well. It’s assembled but not yet glued. The last two legs split out slightly at the top rungs while being drilled, mainly due to the soft wood, but the spalting looks good and it’s square. I don’t have enough wood to make another two legs, which might do the same again so I’ll have to glue it up later this week with the splits. I’ve learn’t a massive amount (about how not to do it as well as how to do it) in just a few days, many thanks to David, Derrick & Veronica and the others for their endless encouragement.

Read Full Post »

Battling Tops


I’ve dropped in this week on a ‘Bodgery’ on the Hampshire/Berkshire borders working on furniture projects (but more of that later).


The current issue of the Bodgers Gazette (as featured on Have I Got News For You) has an excellent article by Robin Fawcett ( aka Treewright ) on how to make Spinning Tops. Chair (& stool ) making activities were diverted for a while to discover whether Robin’s instructions are foolproof.


Speaking for myself, bodgers aren’t too good at following instructions. I don’t think I’m atypical though. Despite initial misgivings in the design the top worked and before long it was battling tops on the kitchen floor.

Could this be the new Wii? Comes with real wood? Thanks to Treewright for stimulating this entertaining diversion and I’m sure it won’t end here!

Read Full Post »


South of Haslemere the Sweet Chestnut coppice is still being worked in rotations of upto 20 years providing material for traditional fencing, particularly the chestnut palings and post and rail fences which are a feature locally. It’s a case of use it or lose.

I live only a few hundred yards from the edge of chestnut coppice worked by a friend of mine, Colin Hampton, so I might be a little biased on this subject. But knowing the local woodsmen well allows me to appreciate the advantages of using this local and sustainable form of fencing.


When I went to collect some more fence posts, struts and strainers Colin was peeling and pointing palings and posts, whilst Wayne was splitting them out at a break inside their tin roofed coppice workshop. The completed pales are laid in the iron grip allowing them to be tightly bundled.


I took this photo earlier in the year when Colin was working up a big order for palings. The neat stacks speak for themselves. It’s not just the end product but every step of the process, the felling, the working up and the selection of material that needs to be right to end up with a job well done.


The peeler is powered from a stationary engine and blows the peelings straight out onto the heap. It’s a lot quicker than the drawknife and axe that I use for peeling and pointing, but I don’t have thousands of palings and posts to produce.


These finished posts were waiting for me to collect and by next week will be part of a field fence less than a mile away. Being peeled sweet chestnut the natural tanins will make these posts last, possibly for decades. There is every chance that they will outlast their softwood cousin’s without the planting, harvesting, transport, extensive processing and worst of all kiln drying and pressure treating with toxic chemicals and…they’re cheaper! What more could you want ? Unfortunately Colin doesn’t do computers so I can’t link to his web-site, but if you are llocal and want some chestnut fencing, paling or lathes let me know and I can put you in touch with him.

Read Full Post »

The drawknife is one of my favourite tools. It might even be my favourite tool but that’s a hard choice to make.

Recent discussions with visitors at shows and on the bodgers forum made me realise that the drawknife and its usage tends to get overlooked. A great shame as it’s a very versatile and capable tool which can do much more than just prepare blanks for the polelathe.

I often get asked three questions at shows. Is that a spokeshave? Isn’t it dangerous using it towards yourself? and which way up should you use it?

When I first joined the APT I was given well intentioned advice that I was using the knife the wrong way around and that I should use it with the bevel downwards (as in the first photo). It seems that most people within the APT use the knife bevel downards.

So I duly learnt to use it bevel downwards, but have found recently that I’ve tended back towards using it bevel edge upwards with the flat back of the blade against the wood.

With the bevel downwards it’s easy to shift quite large shavings. With the bevel edge upwards the back of the knife tends to lie flat on the wood allowing more delicate shaving. When using it this way, like a mortice chisel, its important that the back of the blade is flat with no bevel (small pitting within the flat surface won’t affect it in use).

When I discussed this recently with Anthony Cooper, a broom maker and green woodworker in Plaistow for many decandes, I found that he invariably used the knife bevel upwards. It seems that in this part of Sussex, at least, the drawknife was traditionally used bevel upwards.

The handles on my knife are slightly angled so that it is comfortable with the bevel up or downwards. Some drawknives are designed to be used one way in which case the handles maybe set intentionally at an angle to the blade to reflect this. The large knife in the photo has a different set to the handles and is only comfortable using bevel upwards.

Drawknives come in all shapes and sizes, from tiny to giant, curved and straight, reflecting their intended usage and also the method of manufacture.

The two knives here are curved in both directions. The upper knife is a heavy duty blacksmith made knife and designed for shaving the bark from large coppice poles on a break. We used it recently on the fence line strainers.

The smaller knife is a Marples knife where the carbon steel blade is welded to the back of the knife. These knives are of mass produced but of good quality. It’s not clear why the knife is slightly curved in shape. Does anyone know?

When choosing a second hand drawknife you are looking for one that’s not been mistreated or led too hard a life. There is no a lot of meat left on the blade of this knife. If the carbon steel was welded onto the back of the blade then it may have been used up already, or if the blade has been ground badly it may have lost its temper. But somebody used it like this so there is a chance it may still be useful. I don’t know yet, it’s in the queue.

When looking for a good drawknife I was lucky enough to find my Gilpin at a car boot sale on a general tool stand. I got it for a bargain (£10) considering that it had the original boxwood handles, the bevel was in good condition and showed little signs of wear, more a treasured tool than a knackered one.

The odd chip on the edge of the bevel is not a problem in usage as there is 10 inches of blade and rarely more than 2 inches gets used, so it’s quite easy to use a different section of the blade to achieve a better finish.

There is a lot more to say about drawknives and their uses, but I will leave that for another day.

Read Full Post »

One of the things that’s been keeping me quiet for a week or two is mending fences on some fields adjacent to the Lynchmere commons. The fields overlook the Weald and the South Downs and have been farmed as traditional low intensity pasture and hay meadows since the 1950’s, which makes them quite rare nowadays.

Following the sad death of the farmer a few years ago the fields have been rather neglected whilst the estate is being argued over. The fields and barn are now being managed alongside the Lynchmere commons which gives me a whole new series of opportunities and headaches to take on. One of the tasks is to get to grips with the state of the fences. Some sections are too old to mend and need replacing.


I had my first lesson in field fencing this week when a team of South Downs Volunteer rangers came to help with the first section of fence replacement. We’re putting in post and wire fencing but I’ve sourced the sweet chestnut posts, strainers and struts directly from the coppicer, a friend of mine who is working less than a mile from the fields – so there is a greenwood connection to this post! In the photo David and Arthur are peeling the chestnut strainer (a 5 inch post at the end of a straight run of fence which takes the strain of the barbed wire ) the traditional way using my curved drawknife. They were surprised to find out how well it worked.


With the first section of posts in place the wire is strained onto the end post before being stapled securely. Barbed wire is nasty stuff to work with and all of the old wire has been recovered either for reuse or to remove it. We’d prefer not to use barbed wire but this fence is an interim solution to provide a secure boundary whilst the funding for new sections of post and rail fencing is sought.


The result is a very neat section of fence replacing a tumbledown patchwork of old post and wire, brambles (all blackberries were salvaged before the brambles were cleared) and palings with some iron sections, indicating the field may originally have been fenced with wrought iron fences.


As we worked down the side of the field we reached the point where the fencing is traditional oak and chestnut post and rail. The post and rail has lost too much strength to be secure on its own so we’ve placed the new fence just inside leaving the old post and rail as a feature alongside the footpath.


I took this photograpth from the next field up, nine acres, where the hay has just been made. It reminds me that these fields are worth the effort not just in themselves as tranquil wildflower rich grasslands but also in the context of the landscape on the edge of the weald and downland. We’ve used up all of the posts I had ready to another visit to my friend Colin is needed for more supplies and hopefully he’ll let me take a few photos of him preparing them.

Read Full Post »


Last weekend was the Steam Festival at the Weald & Downland museum. As you might imagine there is a lot of gear about, loads of big boys toys, the dream of all the would-be engine drivers. So I set up on Friday to avoid the rush and with plenty to keep me and the museum visitors amused as the steam engines huffed and puffed around the site.

I spent a lot of time working to make fresh stock. For some reason spurtles were particularly popular at this show and of course rounders bats. I also sold 3 bags of shavings so I’m quite pleased with the way it’s going, but rather than post pictures of more dibbers here are some of the pictures of the big boys toys.

The Fowler showman’s engine is particularly stunning with its decoration and attention to detail on the paintwork. It’s called ‘Lion’ and it runs so smoothly that you can hardly hear it coming. It caught some visitors talking to the blacksmiths by surprise when they failed to notice it rolling up behind them!

This series II landrover arrived at the showground in style, being towed by a traction engine.


The steam carousel is powered by its own steam engine named ‘Warrior’ but Lion’s dynamo generator is used to run the hundreds of lights which make it such an eye catching sight.


All in all there were over a dozen steam engines from showman’s engines to ploughing engines and road rollers, as well as some rare steam lorries, a steam car and even a steam bicycle. I don’t think you are supposed to ask why put a steam engine on a bicycle? I probably shouldn’t mention the steam gramaphone!


Come Saturday evening a run to the pub is becoming a tradition. Several engines took part but a lot of people caught a lift on this wagon. The return journey was not quiet or subtle, the engines on their way back from the pub were audible for miles around and the crowd singing on the tailer even for even further.


Sunday dawned a perfect late summers day, with swiftly vanishing mist and the sun heaving itself languidly back into the sky. Very quiet after a busy day and a night full of steam whistles and singing.


A lot more visitors on Sunday meant that almost 50 people ganged up in the arean to try and heave this road roller backwards across the grass. And once the sneaky driver was made to remove the chock from the wheels they succeeded in some style.

Wagon wheels in the late afternoon sunshine. No steam, but they caught my eye.

and then it was time to take the toys home again.

Read Full Post »


…..went to mow an orchard, two men (and a girl), one man and an angry hive of bees went to mow an orchard…….repeat until done.

That’s the short version. The long version goes like this. Judy agreed to let us have a go at cutting the superb wild flower meadow alongside her orchard once the yellow rattle had set seed. Roy came along with his scythe so we could try mowing with a team of three.


We met on Friday afternoon to do the work but soon after we started the sun came out and with it the bees from one of the hives in the orchard. Once they found us they started to get quite aggressive. Discretion being the better part of valour (well it is for me) we decided to try again on Saturday evening.


Judy’s son Richard joined us on Saturday evening to try his hand at mowing and made quite a good job of it for a first time. The bees were completely quiet and we could mow right upto the hives.


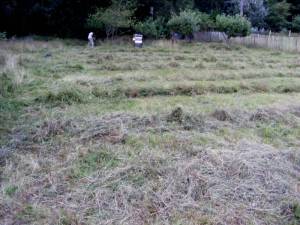
With three scythes we got through the orchard rapidly and we finished before it got dark though less cider might have left the rows a little straighter.

These windrows would have made good hay in a couple of days but unfortunately we had no takers for it on this occasion. Perhaps by next year I’ll have figured out a market for ‘hand cut’ ‘wild flower meadow’ loose hay and be able to sell it at a premium. I’m only half joking.

Read Full Post »


A friend of mine, Robin Fawcett (you can find him here on his Treewright blog) put up an excellent video of how to make a spinning top on youtube and on his blog. I’ve been meaning to make one for quite a while but there always seems to be something more urgent to do first. So with Robin’s excellent instructions it seemed now is the time to try it out.


Robin makes them with their own handle to launch them and this means that you can get them to run quite fast and stay spinning for a couple of minutes or more. The shaft of the top fits through the wide hole of the handle and you pull a cord wound around the shaft out through the narrow hole to start the top. The key to this is how wide you make the top, the wider it is the more energy it can absorb from the starting cord, and this is set by the size of the blank you turn. I plan to experiment a bit with this in the future.


My first top is not the prettiest one around but it seemed to work remarkably well even on a wooden plank in the woodyard. I’ll need to make a couple more before I settle on a product design but I think it will prove to be quite popular.

Read Full Post »

Older Posts »

Omubazi Mike

Green woodworking enthusiast that loves to create and to pass on his skills and knowledge.

Woodlandantics Blog

Greenwood Working & Woodland Crafts

The Scythe Grinder's Arms

for all your Scythe Grinding and more - come on in and join the discussion

Wympole & Wratsworth

Everything you need to know about the countryside at Wimpole

Lynchmerecommons

At work and play on the Lynchmere Commons

Morgans wood's Blog

Traditional crafts and coppicing

Mike Abbott's Living Wood

Green Wood Chair-making

Steve Tomlin Crafts

Handmade wood craft for the home & Learn to Scythe

Old Kiln Forge

Artist Blacksmiths